 Source: Daniel Rubino / Windows Central
Update 10:50 PM ET Microsoft has published its own fix, which requires modification of the registry. The info is re-posted below.
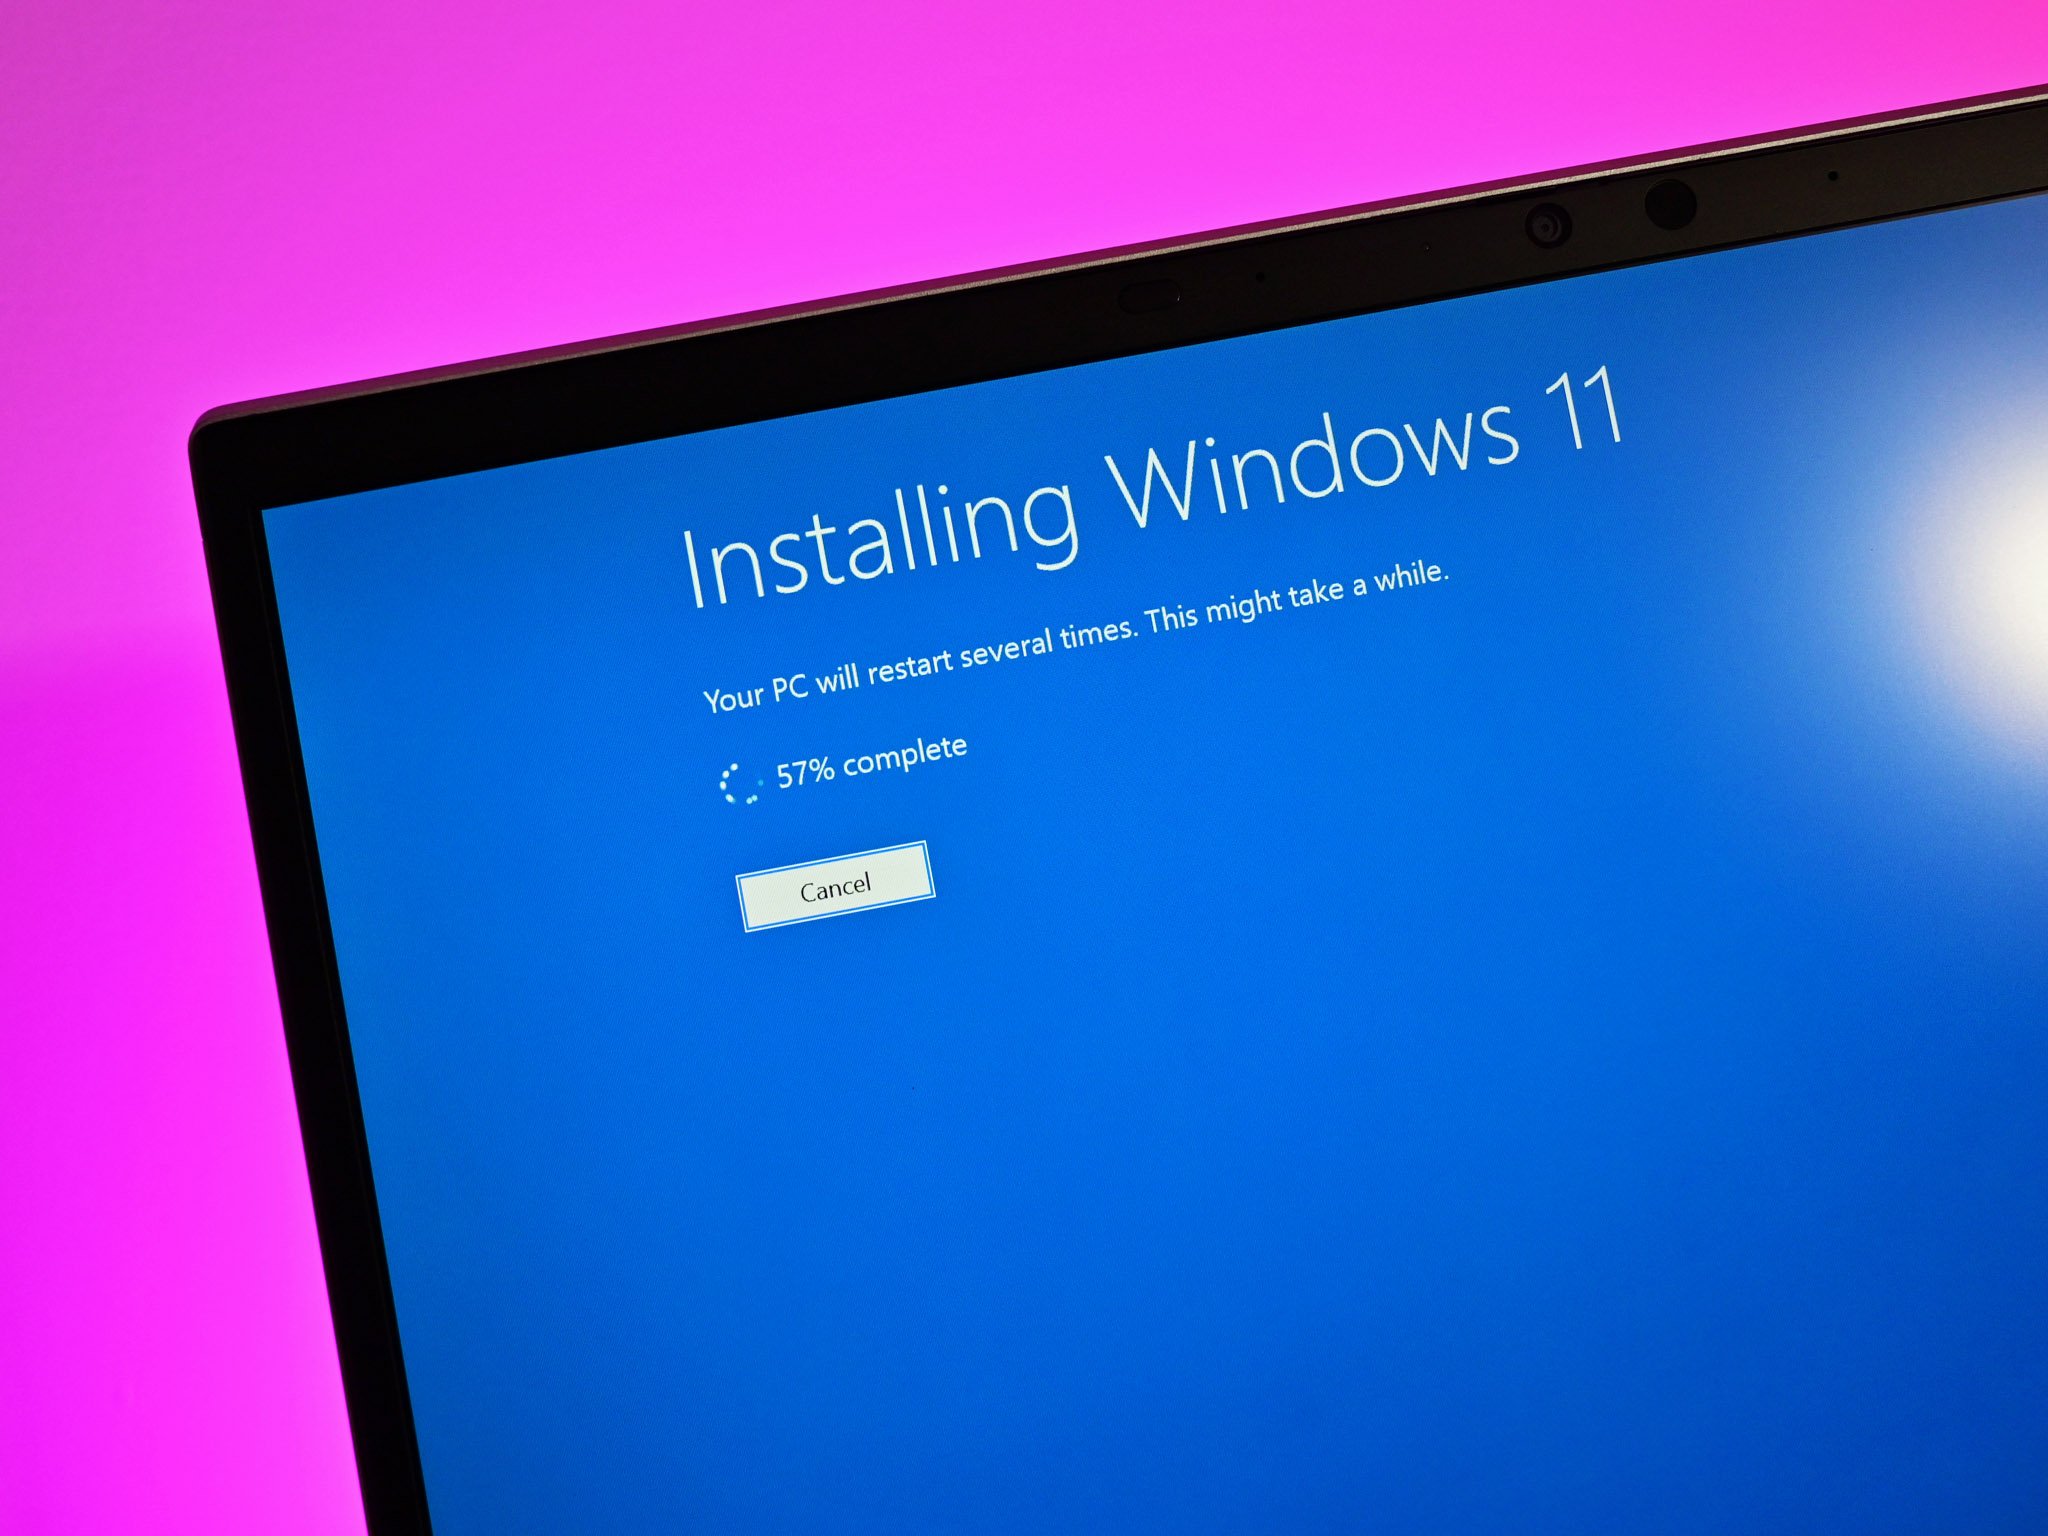
There are known issues, and then there’s one helluva known issue. Turns out, today’s Windows 11 Beta Channel release (build 22000.176) is wreaking havoc on many more PCs than previously.
The issue is simple. You restart your PC and are greeted with a barren desktop. No Start menu, no taskbar. You can still run apps from the Taskmanager, and if you’re fluent in CMD can get a lot done. But for most users, this is nothing short of a nightmare.
The issue is listed in the release notes, and states:
We’re investigating reports from Insiders in the Beta Channel where after upgrading to Windows 11, they are not seeing the new Taskbar and the Start menu doesn’t work. To workaround this if you are impacted, please try going to Windows Update > Update history, uninstalling the latest cumulative update for Windows, and the reinstall it by checking for updates.
While this is a known issue, going by Reddit tonight, it’s a widespread one, not just a few random computers. In one thread, there are over 200 comments so far from people all hit with the same problem. Indeed, our own top-tier Core i9 desktop PC has suffered the same fate (but not our other three laptops).
The workaround from Microsoft seems simple enough: roll back the update either through the OS or through Windows Recovery. But users, including ourselves, find that either uninstalling the latest updates or going back to an earlier Restore Point does not fix the problem.
As a result, many people are stuck tonight.
Official solution is here
Microsoft updated its own blog with the following information:
UPDATE 7:10PM PDT: Recently, Windows Insiders in both the Dev and Beta Channels began reporting that Start and Taskbar were unresponsive and Settings and other areas of the OS wouldn’t load. We quickly discovered an issue with a server-side deployment that went out to Insiders and canceled that deployment. If you were impacted by this issue, you can use the following steps to get back into a working state on your PC.
- Use CTRL-ALT-DEL and choose to open Task Manager.
- Choose “More details” at the bottom of Task Manager to expand Task Manager.
- Go to “File” and choose “Run new task”.
- Type “cmd” in the “Open” field.
- Paste the following: reg delete HKCUSOFTWAREMicrosoftWindowsCurrentVersionIrisService /f && shutdown -r -t 0

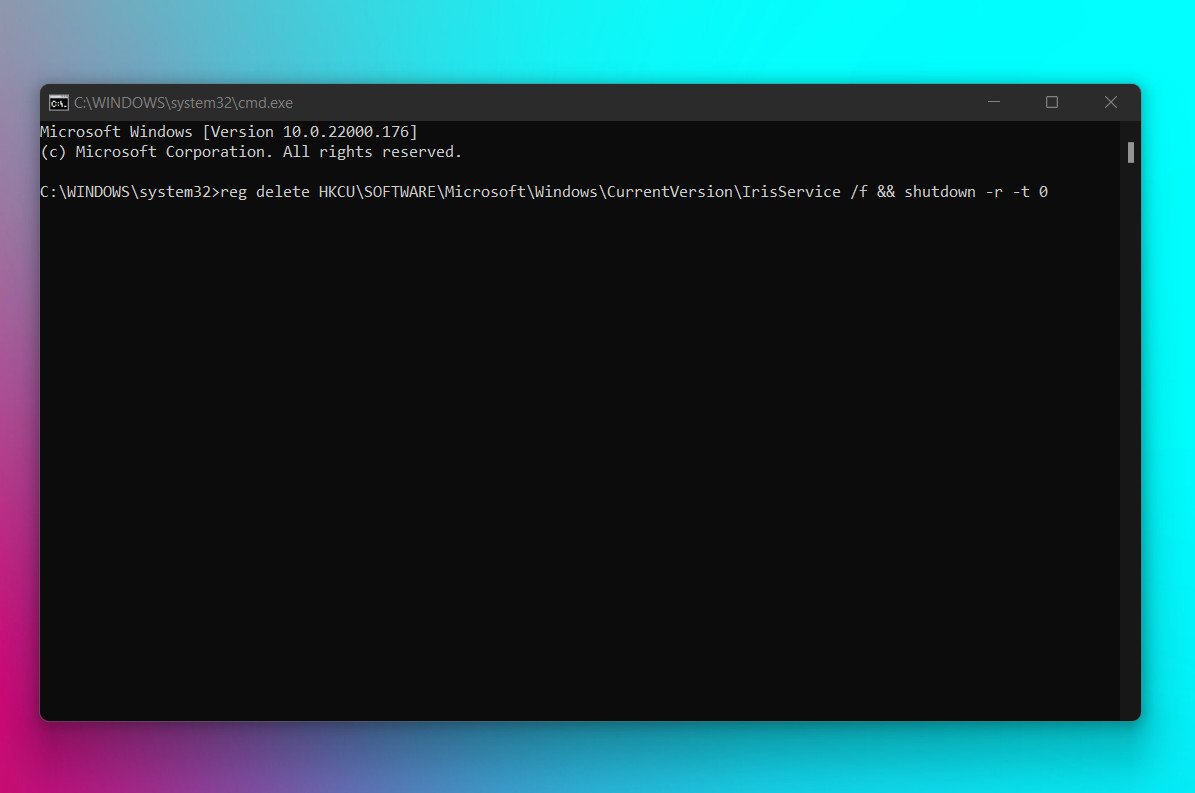
- Hit enter, and then your PC should reboot. After rebooting, everything should be back to normal.
Others are reporting that an official update is coming through Windows Update, but we have not seen it yet on our devices.
Temp solution? Don’t sync the Time and Date.
Note: The methods below are now outdated. You can still do them, but using the above method is easier and what Microsoft recommends.
The easiest way to do get your PC back is by disabling the system clock from synching to the internet.
Here’s how:
- Press Ctrl-Alt-Del
- Select TaskManager
- Select More details
- Select File > Run new task
- Type control.exe

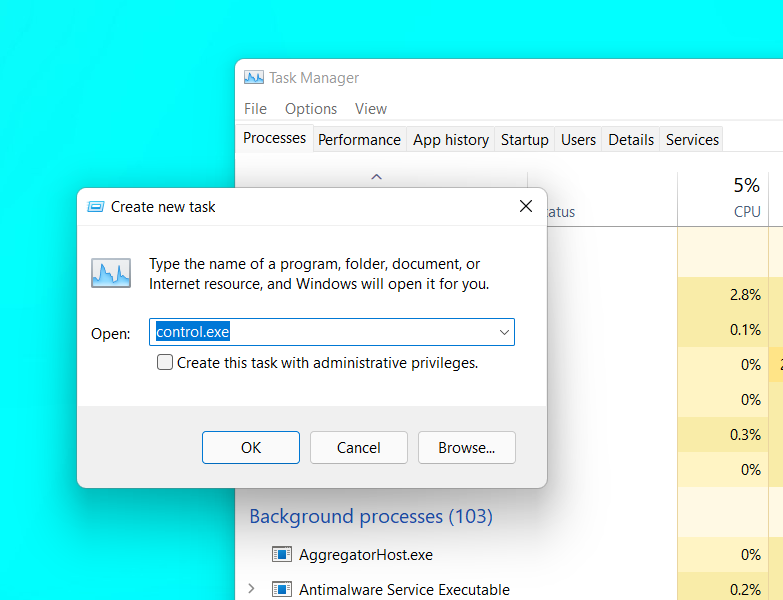
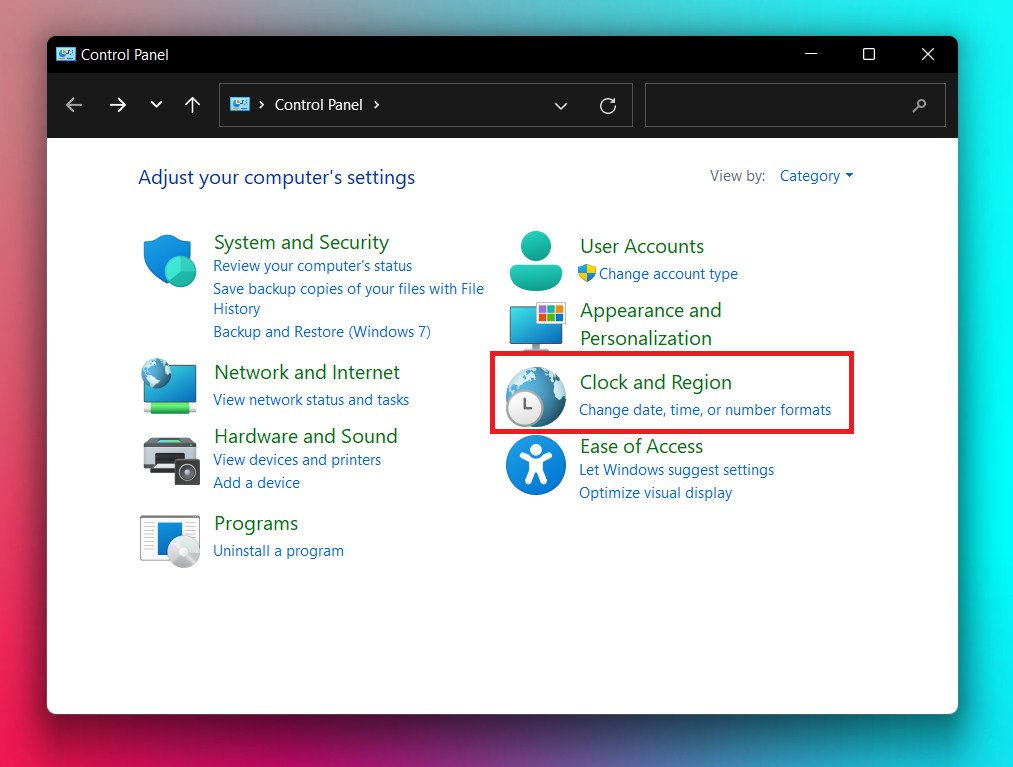
- In Control Panel, navigate to Clock and Region

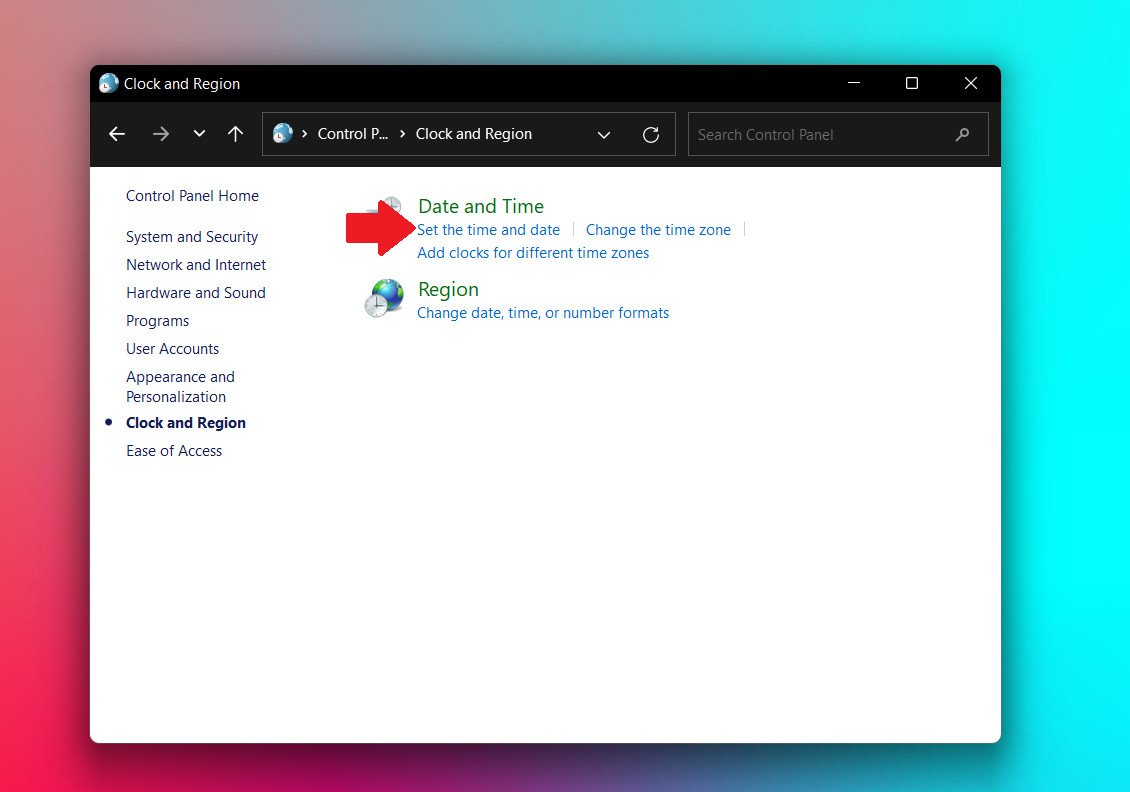
- Choose Set the time and date

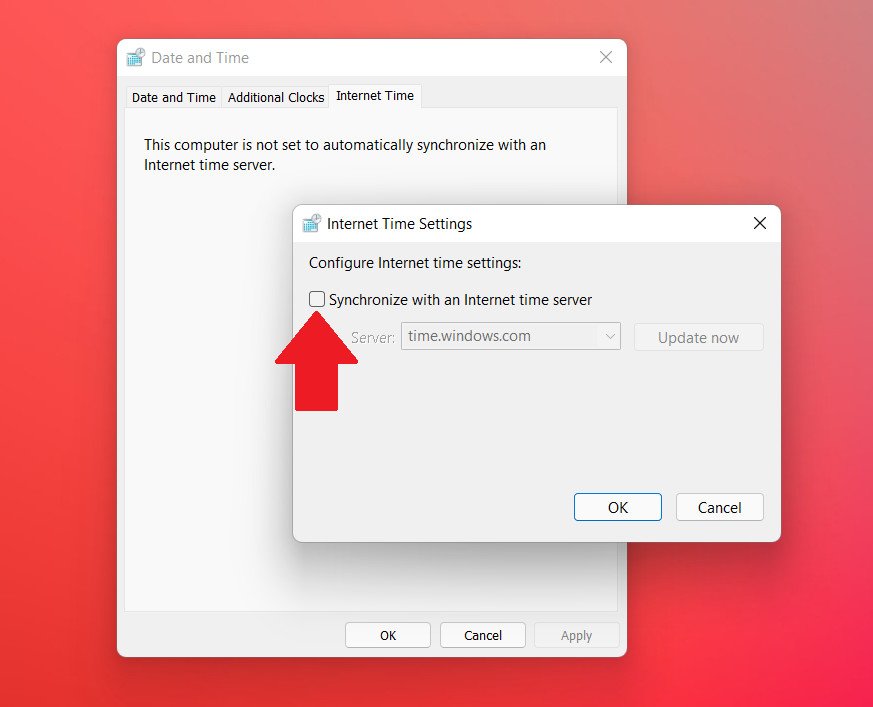
- Under Internet Time go to Change settings and uncheck Synchronize with an Internet time server

- Go back to Date and Time tab and select Change date and timezone

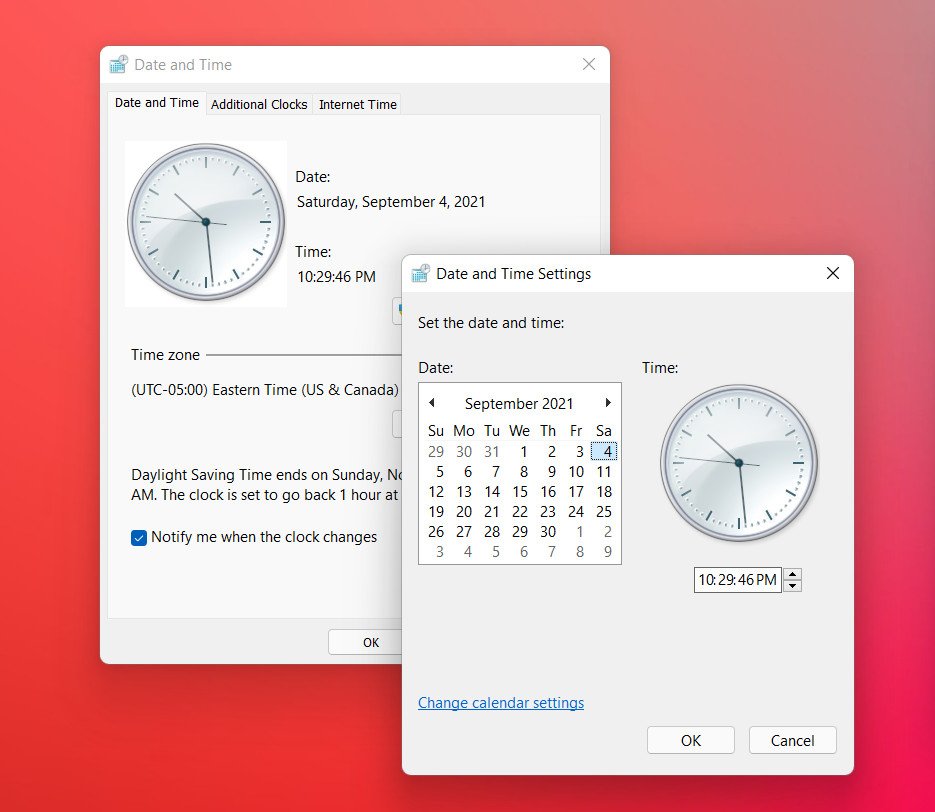
- Set the calendar to a few days ahead of the current date and hit OK
- Restart the PC
After rebooting, if everything is working, it appears you can set the time and date back manually and still be OK after another reboot. If not, you now know how to fix it!
Thanks, Daniel C. and MofLevi, for this tip!
Another method is found below, although you don’t need to do both. This method creates a new user account and starts anew.
Here’s how to do it:
- Press Ctrl-Alt-Del
- Select TaskManager
- Select More details
- Select File > Run new task
- Type in CMD with Create this task with administrative privileges enabled
- At the command prompt, type: net user username password /ADD replacing “username” and “password” with your choice, e.g., net user Bill 12345 /ADD. Hit Enter.


- We then need to give that account administrative level access. At the command prompt, type: net localgroup administrators username /ADD replacing “username” with the account name chosen in step 6 above and hitting Enter.


- Press Ctrl-Alt-Del again
- Choose Switch users and log into the new account
Following these steps will re-launch the out-of-box experience and get you back into Windows 11 with the Start menu and taskbar. However, it’s a new account, so all your old apps will need to be re-setup.
Your old, original account is still present, and nothing has changed. Once Microsoft pushed out an update, you can go back to the original account and delete this newly created temp, local account.
Let us know if it has worked for you, or if you have found another solution in comments!
Thanks for the tip, Paul K.!


Here’s everything we know about Destiny 2: The Witch Queen
Destiny 2: The Witch Queen is coming early in 2022, and it sounds like it might end up being one of the game’s biggest and most revolutionary expansions ever. Here’s an overview of everything we know about The Witch Queen so far.


Don’t have TPM support? Try one of these motherboard modules.
If your PC somehow does not have trusted platform module (TPM) support through firmware and your UEFI BIOS, we’d recommend checking your motherboard manual for a TPM header. If you have one present, you can try to see if one of these will be compatible to get you ready for Windows 11.
